If you’ve been creating Midjourney images that look nice but that are missing a little something, using Midjourney's parameters might be the perfect solution. Although Midjourney will create impressive images without adding parameters to your prompts, learning what the parameters are and how they affect a finished image will definitely give your images a boost.
What's even better is that learning how to use Midjourney parameters isn’t hard. In fact, this is a great excuse to experiment with your image creation process. Take your time learning what they do and incorporate them into your work as you get comfortable with them.
To learn more about what parameters are, how they change an image, and how to include them in your image prompts, continue reading!
What Is Midjourney?
Midjourney is an AI image generator that creates images from a text prompt. You can generate AI images of anything you can think of as long as you can describe it.
Even if you don’t know anything about AI or about Midjourney’s features, you can create top-notch images in seconds with a basic prompt. Of course, the more you explore Midjourney and prompt writing, the better your images will turn out. This is because the better you can describe the image you want, the more accurate Midjourney’s output will be.
Because of this, we recommend that you get to know the different Midjourney parameters and what they can add to your images. As you start incorporating parameters and more detailed descriptions, you’ll see how your results improve!
✨ Learn how to use Midjourney to create stunning AI images!
What Are Midjourney Parameters?
As you learn the Midjourney basics, parameters can sound intimidating, but these are actually really easy to understand and add to your prompts.
Think of parameters as add-ons that can introduce more detail to a prompt. Some parameters allow you to customize an image further by selecting things like the aspect ratio for your finished image. Others are more useful for the actual image-generation process and allow you to choose things like the speed at which your image is generated or the version of Midjourney used to create your image.
To apply parameters to an image, you simply add them to the end of your prompt. There are no additional toggles or hidden options you have to look for. You can also add more than one parameter to each prompt to get the most accurate Midjourney images every time.
Midjourney Parameters List and How to Use Them
Before you get overwhelmed by all the parameters, keep in mind that you don’t have to memorize them. Midjourney has a list of them you can refer to, but you’ll also find that you’ll just remember them over time.
We’ve also created this comprehensive list of all the Midjourney parameters you can use. The list includes a description of each and an example of how they affect an image or the generation of an image.
Feel free to bookmark this list so you can return to it as often as you like.
Without further ado, let's take a look at the Midjourney parameters.
Midjourney Parameters That Change Image Generating Speed
Fast
This parameter lets you change your current speed setting to Fast Mode for a single job.
How to Include It in Your Prompt
Add --fast to the end of your prompt.
Relax
Next, this parameter is basically the opposite of the fast parameter. Using the relax parameter allows you to change your current speed setting and run a single job in Relax Mode.
How to Include It in Your Prompt
Add --relax to the end of your prompt.
Turbo
Finally, just like relax and fast, turbo lets you change your current generating speed to turbo for a single job.
How to Include It in Your Prompt
Add --turbo to the end of your prompt.
Midjourney Parameters That Let You Select a Different Version of Midjourney
Version
Midjourney’s default model is its most current version, but this doesn’t mean you’re stuck using the newest iteration. In fact, you can use the version parameter to switch to and experiment with any past version of this tool. You may want to try out an older version and compare the results to a newer version, but keep in mind that the newest model will give you the sharpest results.
Be sure to specify what version of Midjourney you want when using this parameter. You can choose from 1, 2, 3, 4, 5, 5.1, and 5.2.
How to Include It in Your Prompt
Add --version or --v followed by the version number. Ex: --version 4
Niji
The Niji parameter is a collaboration with Spellbrush and is ideal for creating anime-style images.
You can use the --style parameter when using Niji to stylize your images further. Choose from parameters --style cute, --style scenic, --style original, or --style expressive to achieve different aesthetics. We'll cover these in more detail in the section about the --style parameter.
How to Include It in Your Prompt
Add --niji 5 to the end of your prompt. Ex: --niji 5
Midjourney Parameters That Affect the Final Generated Image
Aspect Ratios
Midjourney’s default aspect ratio is 1:1, but you can change the aspect ratio using this parameter.
The aspect ratio you choose will determine the shape of your image and can impact the composition. Aspect ratios are written as two numbers separated by a colon with the first number representing the width of the image and the second number the height. Since the default in Midjourney is 1:1, it will produce a square image.
You can find the aspect ratio for every type of social media image you want to create and for other applications with a quick Google search. For example, if you’re creating an image for an Instagram Story you would need to use 9:16.
How to Include It in Your Prompt
Add --aspect or --ar at the end of your prompt followed by the aspect ratio you want. Ex: --ar 3:2
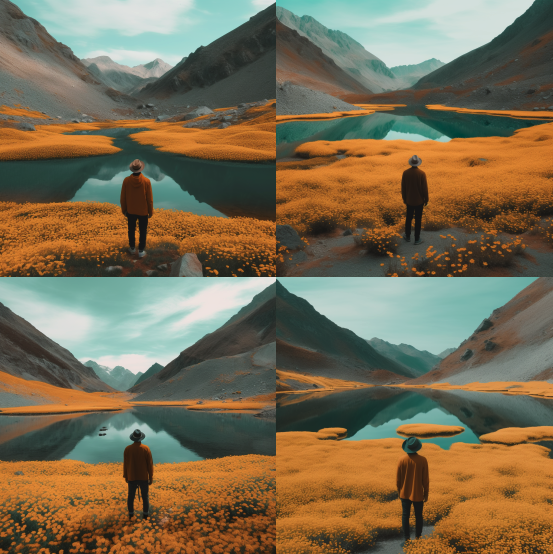
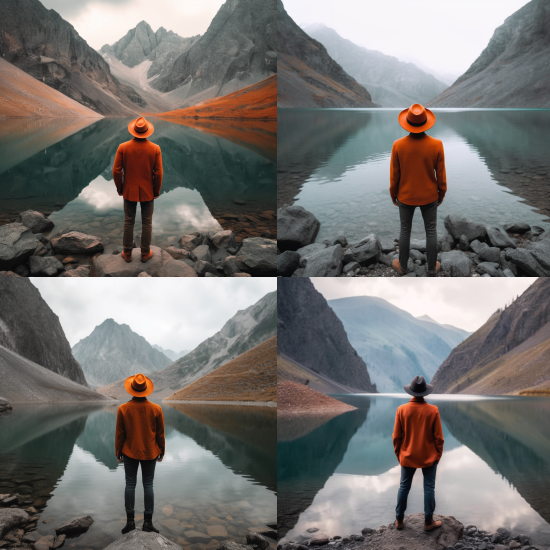
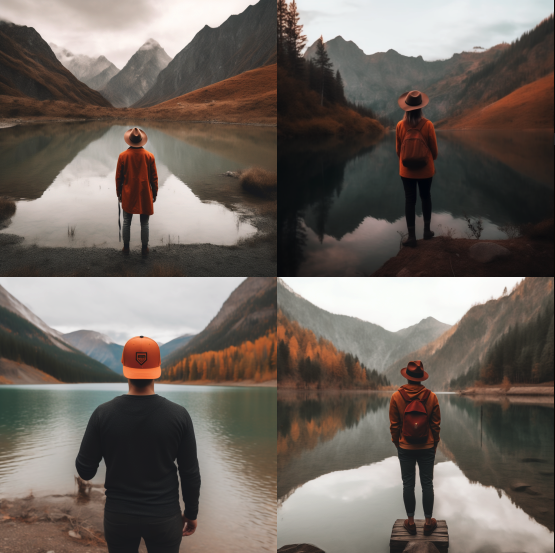
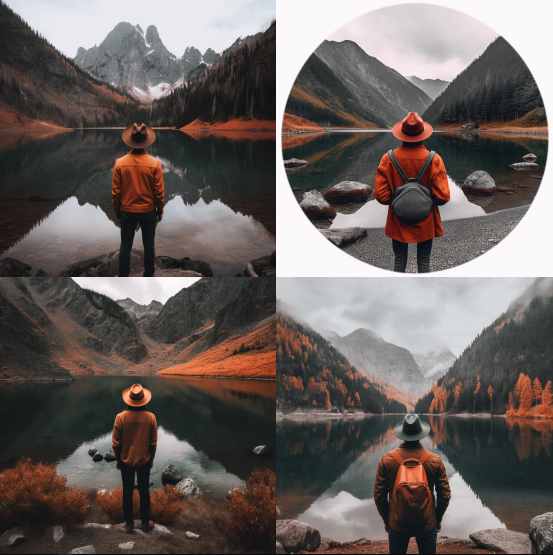
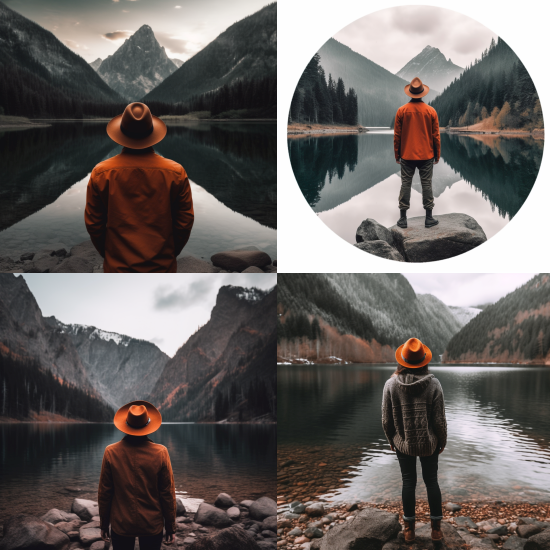
Chaos
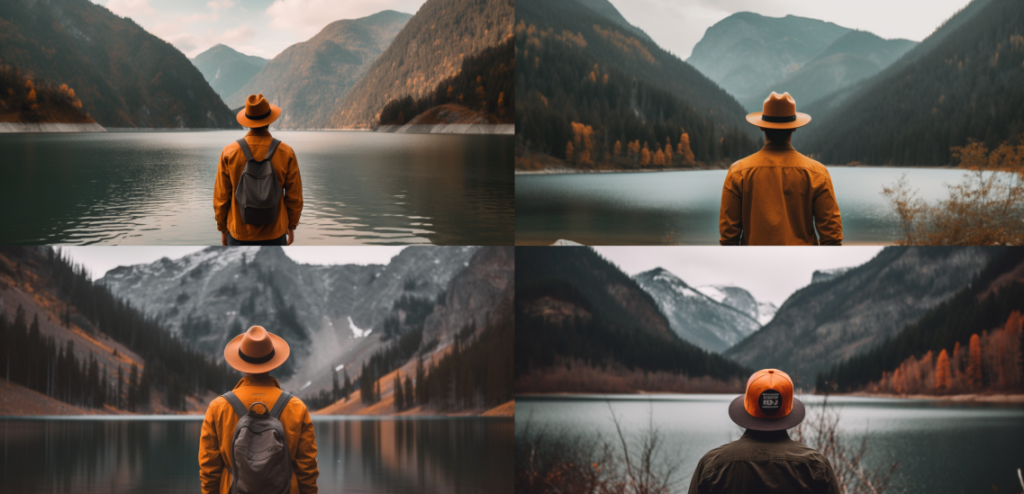
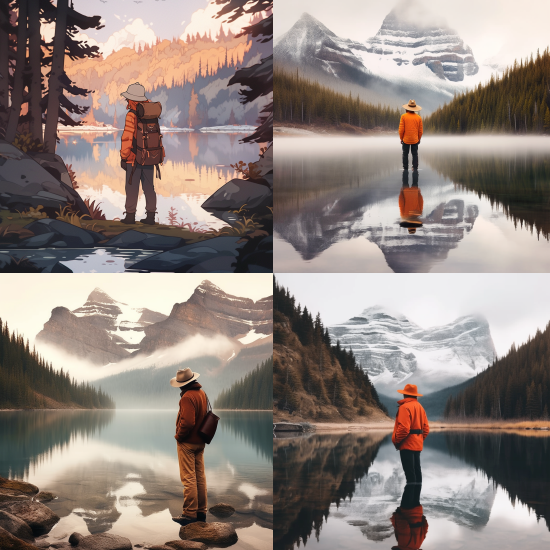
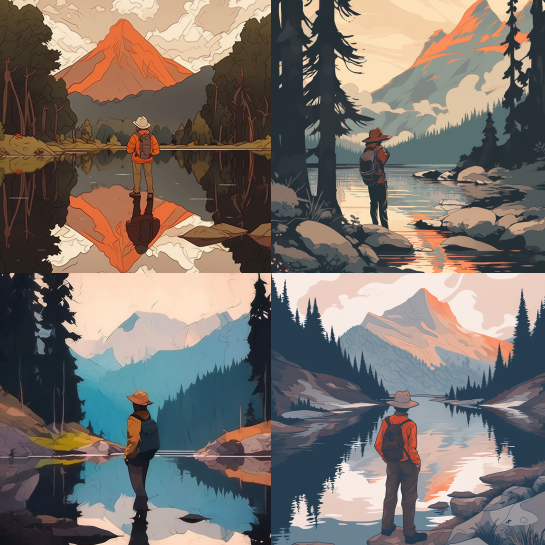
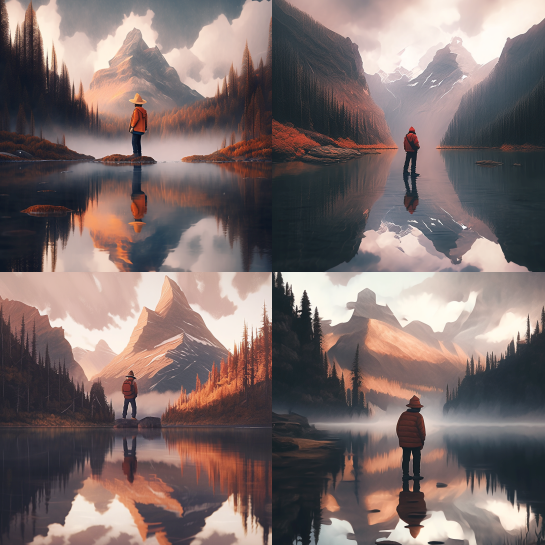
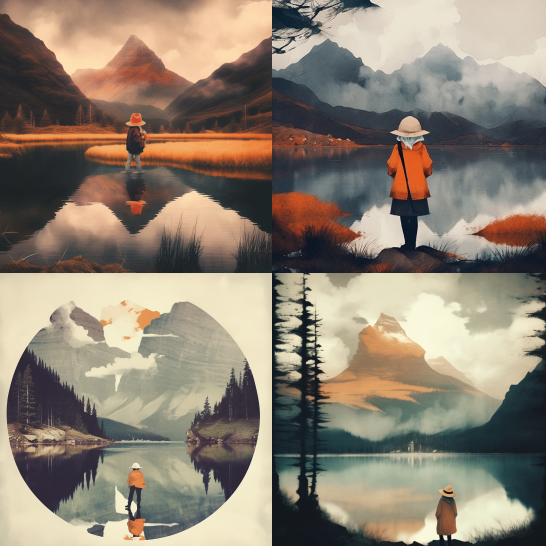
Using the chaos parameter will let you control how random or unpredictable your image results are. You can control this by including a number from 0 to 100 with 0 being the default and 100 being the most chaotic.
This sounds a bit conceptual, so definitely experiment with it to see what chaotic results look like versus more consistent results. Pay attention to how varied the initial results are depending on the value you attach to this parameter.
How to Include It in Your Prompt
Add --chaos followed by a number between 0 and 100 to the end of your prompt. Ex: --chaos 50
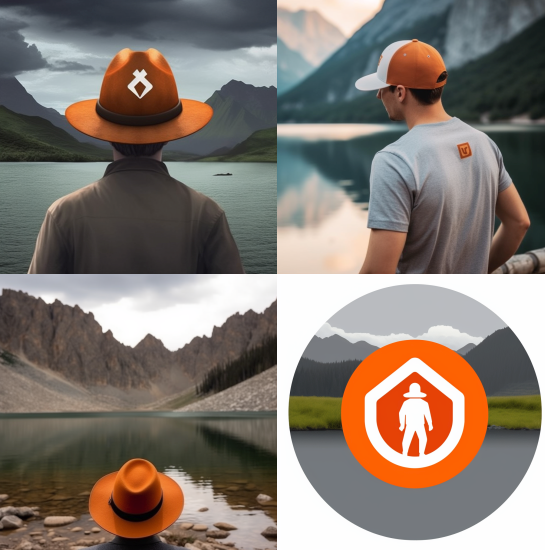
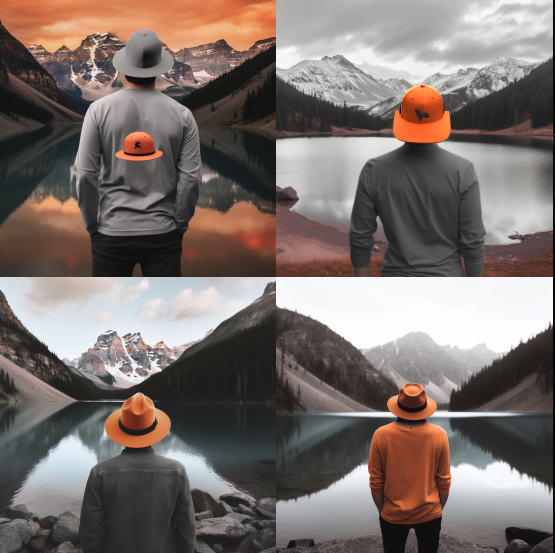
Image Weight
To create images with Midjourney, you don’t have to stick to just text prompts. In fact, Midjourney gives you the option to upload images as part of your prompt. When you use an image and a text prompt to generate a new image, you can use the image weight parameter to determine how much influence the image you’re uploading has on the result.
This parameter has to be accompanied by a number between 0 and 2. The higher the number, the bigger the impact of the image on the finished result. These don’t have to be whole numbers, so feel free to use decimals.
How to Include It in Your Prompt
Add --iw followed by a number between 0 and 2 to the end of your prompt.
For this example, we're combining the prompt we've been using for all of the example images and this image:
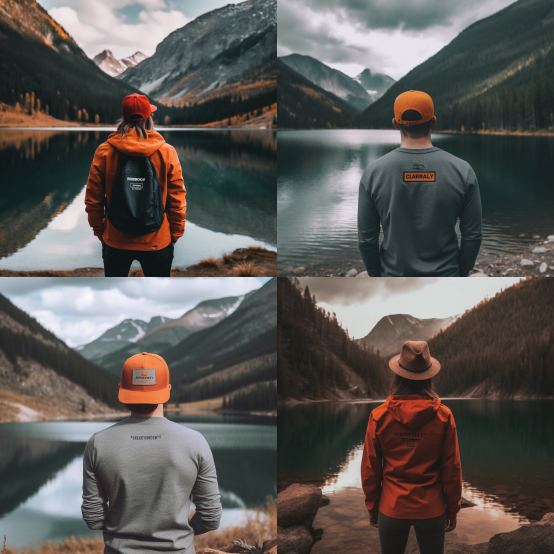
No
The no parameter allows for what is commonly called negative prompting. This lets you control your results a bit more by letting you specify something you want to avoid in your final image. This doesn’t always work perfectly, but it doesn’t hurt to give it a try.
How to Include It in Your Prompt
Add --no followed by what you want to exclude to the end of your prompt. Ex: --no flowers
Quality
The quality parameter changes how much detail is included in an image, but higher-quality images also take longer to generate. The resolution of the image won’t be affected by this parameter, so it’s best to use it when the image you’re generating requires more detail.
How to Include It in Your Prompt
Add --quality or --q followed by .25, .5, or 1 to the end of your prompt. Ex: --q .5
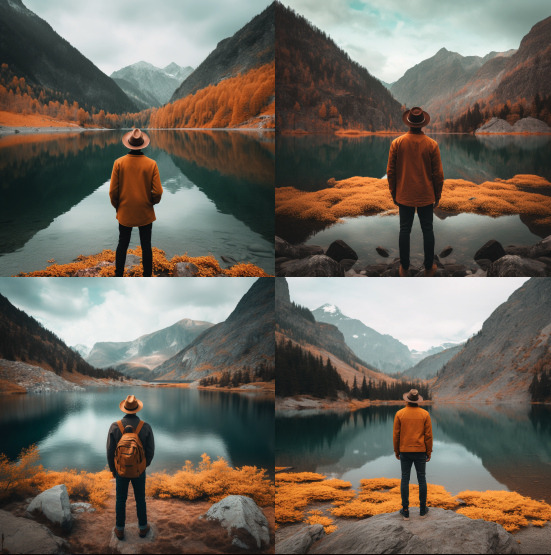
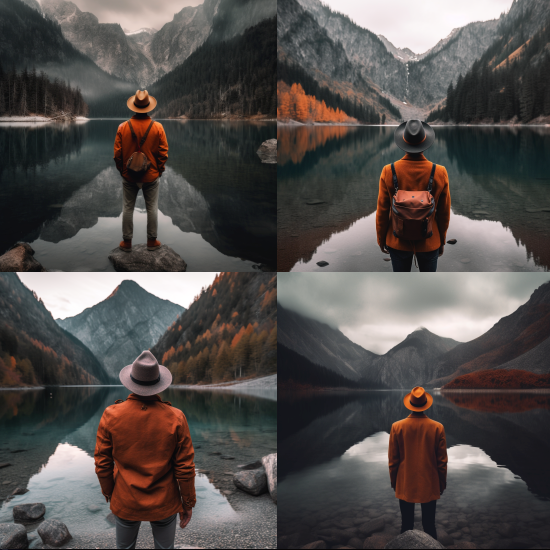
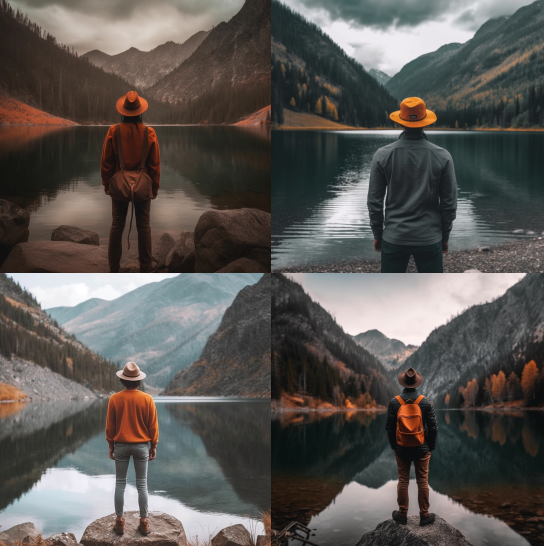
Seed
Every job processed by the Midjourney Bot has a random number attached to it called a seed. Using the same prompt and seed combination from a previous job will give you basically identical results.
To get the seed for a past job, respond to the finished job with the envelope emoji. The Midjourney Bot will send you the job ID and the seed.
How to Include It in Your Prompt
Add --seed and a number between 0 and 4294967295 to the end of your prompt. Ex: --seed 25
Copy and paste the prompts attached to the images below to reproduce the same results. Make sure you use the same exact prompt and seed for this to work.
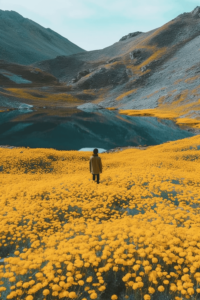
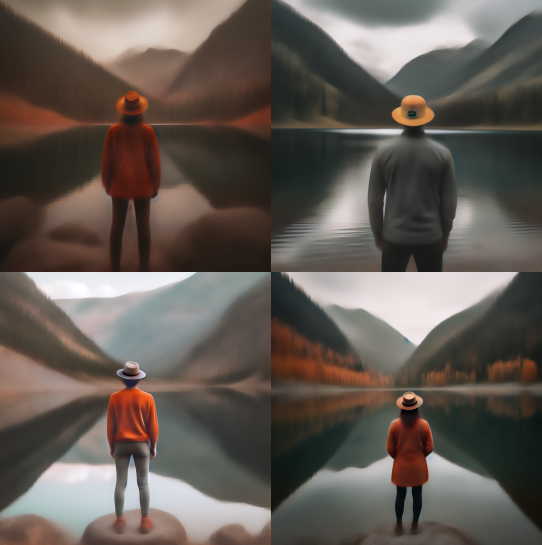
Stop
The stop parameter lets you stop a job before it’s finished. It must be followed by a number between 10 and 100 and will stop the job at the percentage that corresponds with the number you chose. For example, 50 will stop the job when it’s at 50%.
Using this parameter results in a blurry, unfinished image. It’s a stylistic choice you can experiment with if you’re opting for a more artsy result.
How to Include It in Your Prompt
Add --stop followed by a number between 10 and 100 to the end of your prompt. Ex: --stop 50
Style
The style parameter lets you take more control over the images you’re creating. You have different style options depending on the version of Midjourney you’re using, so be sure you know what version you’re working with.
How to Include It in Your Prompt
For Midjourney versions 5.1 and 5.2, use --style raw to minimize the impact of Midjourney’s default style. This parameter ensures your image results are more closely representative of your written prompt. Think of it as if the Midjourney Bot has less of a say or opinion when interpreting your prompt.
For Niji versions of Midjourney, you have the option to use the following style parameters:
- The --style original parameter is the default Niji setting.
- Using --style expressive creates a more sophisticated illustrated feeling.
- The --style scenic parameter will create beautiful scenic backgrounds and cinematically stylized character moments in more fantasy-type surroundings.
- Finally, use the --style cute parameter to create adorable characters and settings.
Stylize
Midjourney has a distinct style that it applies to all the images the bot produces. According to Midjourney, the bot creates images that “favor artistic color, composition, and forms,” but you don’t have to stick to this predetermined style. The stylize parameter allows you to stray from this default style, giving you more creative freedom in your image creation.
This parameter must be accompanied by a number that represents how much you want it to stray from the default Midjourney style. The default is 100, but you can opt for any number from 0 to 1000. The lower the number, the more the images produced will resemble the prompt and be less artistic. The higher the number, the more stylized, or artistic, the image will be. It's important to remember that a higher number can lead to images that may not represent the prompt as closely.
How to Include It in Your Prompt
Add --stylize or --s followed by a number between 0 and 1000 to the end of your prompt. Ex:--stylize 500
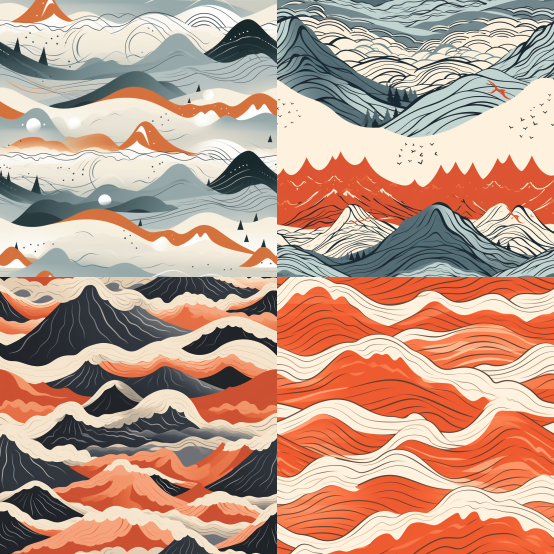
Tile
This parameter generates images that, like the tile in your home, can be pierced together to create a seamless pattern. Because of this, it’s ideal for designing wallpapers, textures, and any other type of image that requires a seamless pattern.
This parameter doesn't work perfectly every time and is still being tested. Even so, it's worth trying out since it can produce some great results and will only get better in future Midjourney iterations.
How to Include It in Your Prompt
Add --tile to the end of your prompt.
Weird
The weird parameter is a lot of fun if you’re looking to experiment with more unconventional or unique images. This parameter will add quirky and offbeat details to your image, giving you some truly weird results.
This parameter also requires a number from 0 to 3000 to determine how weird you want your results to be.
How to Include It in Your Prompt
Add --weird or --w followed by a number between 0 and 3000 to the end of your prompt. Ex: --weird 1500


Repeat
Finally, this parameter lets you run a job multiple times giving you even more iterations of the same prompt without having to submit it over and over again.
The number of repeats you can ask for in a single prompt varies depending on your subscription. Currently, Basic subscribers get anywhere from 2 to 4 repeats, Standard subscribers get 2 to 10 repeats, and Pro and Mega subscribers get 2 to 40 repeats.
How to Include It in Your Prompt
Add --repeat or --r followed by a number between 2 and 40 depending on your subscription. Ex: --repeat 20
How to Combine Midjourney Parameters
It’s clear that Midjourney’s parameters give you more control over your finished images and allow you to be more creative with your work. Using just one parameter can change your image result, but can you use more than one parameter per job for even more control?
Of course! You can combine multiple parameters into a single prompt as long as they don’t cancel each other out. Some parameters will only work in the newest version of Midjourney, so make sure the version you're using and the parameters are compatible. Feel free to change the aspect ratio, use tile to create a pattern, and add the weird parameter to make the results more unique.
Combining multiple parameters in one prompt gives you more control over the finished image, so make them work for you!
Final Thoughts
Whether you're new to Midjourney or have been using it for a bit, it's always worth it to take your time experimenting with its many features. You have plenty of time to master every new feature and parameter, so don't feel pressured to learn it all in one sitting. Have fun and get creative to develop a process that works for you and your image creation needs.
Before you go, don’t forget that Freeflo has thousands of free AI-generated images and the Midjourney prompts used to create them. Use these prompts to start experimenting with Midjourney and see how the images change when you apply different parameters to them. This is a creative process so let your imagination run free and enjoy the process!